
Logitech Brio 4K Webcam Review
As an Amazon Associate I earn from qualifying purchases. Amazon links in article are affiliate links.
This is an in-depth, technical review of the Logitech Brio 4K UHD Webcam. In this review I will cover:
Specifications
Price
Build Quality
Image Quality (and how to maximize it)
Audio Quality
Software
Problems
Verdict
Frequently Asked Questions (FAQ)
Specifications
Maximum resolution and frame rate: 1080p, 60 FPS and 4K, 30 FPS. (USB 3.0 required. 1080p, 30 FPS is max with 2.0 connection.)
Detachable USB 3.0 Type-C to Type-A cable included. 85 inches in length.
Field of view: adjustable 90 degrees, 78 degrees, 65 degrees.
2 built in microphones.
Detachable monitor clip with 1/4th inch tripod thread.
Price
I bought my Logitech Brio (Amazon) for $150, and the MSRP on launch was $200.
The product may be listed as the “Logitech 4K Pro” depending on where you buy it. $150 is less than I got my Logitech Streamcam for, and the Brio cost me $100 less than the launch MSRP of the AVerMedia Live Streamer CAM 513 (my review).
Current pricing is in the link above.
Build Quality
The main body of the Logitech Brio is 4 inches wide, 1 inch tall, and 1 inch thick (front to back). The lens is glass, and the black part of the body and the monitor clip is plastic. I can’t tell for sure if the silver part of the body is actually metal or just hard plastic.
Detaching the monitor clip requires you to pull it straight out which makes it feel and sound like it will break, but it won’t.
Tripod thread on bottom.
Detachable monitor clip.
USB-C port.
The Brio can’t be tilted up or down or turned left or right, so it’s basically stuck in a fixed position.
Overall the build quality is passable. Logitech could have put the tripod thread on the bottom of the monitor clip and allowed for some rotation on the body. The wire could also use a few more inches, but you can replace it with your own since it is detachable.
Detaching Brio from Monitor clip.
Brio wire length about 85 inches.
Image quality
In this section, I'm going to cover:
out the box performance
how to optimize lighting and settings
sharpness
color accuracy
depth of field
autofocus
Out the box performance
These images were recorded in OBS with default (automatic) settings.
Daylight only, 78 degree field of view. 1080p.
Logitech Brio at night, overhead light only, 90 degree field of view. 4K.
With just daylight, the image is passable, but a lot of detail is lost. The uneven shadows also make for an unflattering image. Still, this is much better than other webcams with this amount of light.
At night, there's not a lot of hope, as the image is grainy and color reproduction is pretty much impossible. This is common for pretty much any camera.
How to optimize the Brio’s quality with lighting and settings
Lighting
The Logitech Brio is at its full potential with a lot of light. How much light? As much as you can give it. In the day time, I use the Elgato Ring Light (my review) and the LimoStudio LMS 103 umbrella lighting kit.
At night, I'll be using the Elgato Ring Light, LimoStudio LMS103, and two Elgato Key Light Airs as back lights. All my lights are at maximum brightness at night, and I like the color temperature around 5250 Kelvin. During the day, the temperature can be adjusted with the sun.
Elgato Key Light (left), Ring Light (middle), Key Light Air (right).
Setting up Limostudio LMS103 Lighting Kit.
Settings
Using OBS, here are the best settings I’ve found for the Logitech Brio:
The exposure is generally best at about -5 or -6. -5 is brighter, but -6 has less motion blur. At -4 the shutter speed is just way too slow to get a usable image as it effectively drops the frame rate. -7 is almost always too dark unless it’s day time with a flood of studio lighting.
The gain (light sensitivity) is best at 0 if at all possible to keep the graininess of the image to a minimum. But in some cases, I'll raise it up slightly maybe to 20 at the highest.
Less motion blur at -6, but requires a gain increase to maintain brightness.
More motion blur at -5, but gain can be set to 0.
White balance should be set manually. Usually around 4100 works at night for this lighting setup, but it will depend on your light source. One thing I don’t like about the white balance on the Brio is it’s actually impossible to replicate the look achieved by auto-white balance. When set to automatic, the Brio has the ability to add in some yellow that you simply can’t access no matter how much you change the slider.
Auto white balance. This yellow shade can’t be replicated with manual controls.
Manual white balance at 4080.
Now let's break down the Brio’s performance with these optimizations.
Sharpness
At 1080p, the Logitech Brio has above average sharpness for a webcam. You can still see text from a distance, but there's definitely a lot of detail lost compared to if you were actually looking at the scene yourself. The edges of objects are a bit soft and pixelated, and textures look airbrushed.
At 4K, the edges on objects are clean and you can even see screen print textures on shirts. The image looks great, and it blows out camcorders at similar pricing.
This detail is useful for green screens. At 1080p, using a green screen with the Brio is pretty good, but the soft edges make removing the green from stills a bit inaccurate. Using a green screen at 4K is excellent.
4K, 30 FPS. Manual settings in OBS. Daylight + Elgato Ring Light.
1080p 60 FPS still.
Using a green screen at 4K.
Canon VIXIA HF R800 camcorder daylight only. 1080p.
Color accuracy
On automatic settings, the Brio’s colors are all over the place. Sometimes things are too blue or too yellow, but usually they're too red.
I prefer to manually adjust the white balance to get things in the middle. Even when doing this, the colors are still not quite as close to reality as the Logitech Streamcam, but you can improve them a bit more by changing the video format.
The Logitech Brio can record in 3 different video compression formats: MJPEG, NV12, and YUY2. It can only record 1080p 60 FPS, 1440p 30FPS and and 4K 30 FPS at MJPEG. The following pictures are all 1080p 30 FPS stills.
The footage recorded with MJPEG appears the most compressed, and some of the subtleties of brown and orange are lost compared with NV12 and YUY2. This is one of the reasons the Brio is notorious for having oversaturated colors. It approximates a lot of red and pink in skin tones on its default video format (MJPEG). It can't get the brown of my skin quite right, but it’s workable.
MJPEG full color range.
NV12 full color range.

YUY2 partial color range.
YUY2 full color range.
NV12 and YUY2 both replicate color better, with YUY2 appearing the most realistic. You can also change the color range to match up with the video format. In my experience, these are the best color range selections for each format:
MJPEG: Full
NV12: Full
YUY2: Partial
Even though YUY2 appears to show a greater difference between similar colors in partial, it does not show as much detail with bright whites and dark colors well. So anything kind of dark looks more black, and anything bright seems more white.
I still find partial better than full because full color range creates a washed out haze on YUY2.
If you're looking to improve your colors, YUY2 is really cool to look into, but if you're trying to record 1080p 60 FPS or 4K 30, then these are kind of irrelevant, and you're stuck with the MJPEG colors which are still decent, but not the best.
Depth of field
The Logitech Brio has a deep depth of field. That means, no blurry background and no bokeh. But like I said, the 4K is pretty sharp, so there are still a few ways to get a fake blurry background.
The method I use is with a green screen and pasting a blurred picture of my background to the layer underneath the webcam. This is where the sharpness of the Brio’s 4K comes in handy.
There are less effective, software only methods like XSplit VCam and Chromacam, but you have to pay for those so if you're gonna spend money, you might as well get a green screen. If you want real depth of field, the best choice is to get a DSLR with a wide aperture lens.
Autofocus
When I first got the Brio, the autofocus was pretty good and fast. It's still good, but I learned it’s mostly well calibrated for faces, and it will try to avoid focusing on other things if a face is in frame. Unless you intend on putting things right next to the camera, I'd just turn autofocus off so you never go out of focus.
Autofocus not cooperating!
Audio Quality
Here’s an audio sample of the Logitech Brio. The built-in microphone sounds muddy, but it’s surprisingly less embarassing than other webcams I’ve been testing. It’s useable for Zoom calls, but to sound your best, you should at least get a budget USB microphone to go with this.
One of the mics I recommend is the Fifine K669B which I’ve also compared with the Blue Yeti. The mic you see scattered in this review is the Razer Seiren Mini.
Software
The Logitech Brio is plug and play, meaning once you plug it in, it automatically installs its necessary drivers in a few seconds and then can be used in any program that accepts webcams. So you can immediately start using it in Zoom or OBS.
Logitech also has two applications on their website for the device: Logitech Capture and Logitech G Hub.
To get the best possible image quality, I highly suggest using OBS to tweak your settings and recording or streaming straight in that. And if you're video conferencing, send your OBS footage to Zoom with OBS Virtual Camera (my guide). So you can just do that and skip this whole section…
But just so I can be through, let me demonstrate what happens if you use the Brio in Logitech Capture, Logitech G Hub, or directly in Zoom.
Logitech Capture
Logitech Capture, also known as Logi Capture can be downloaded separately from Logitech's website, and it allows for some basic adjustments like resolution and frame rate. You can add in a second scene like window capture, and you can change your audio source. It still lacks the granular webcam control available in OBS.
You cannot adjust the gain and even though you can set "priority" to frame rate or exposure, you can't change the exposure manually. Logi Capture is maxed out at 1080p 60 FPS. That means there's no 4K functionality in the native app for a webcam marketed for its 4K.
Logitech, please.
1080p max on the Brio? Bruh.
Logitech G Hub
Logitech G Hub serves a different purpose. It can't actually record anything itself, but functions as a settings preset program. It works with Logitech’s webcams like the Brio, but many of their other peripherals like keyboards.
One of the biggest weaknesses with Logitech webcams (and most webcams on the market), is most or all of your settings get erased and set to default when you unplug the device or when your system is restarted. One of the few exceptions to this is field of view, which for some reason persists indefinitely until you change it back.
Logitech G Hub combats this by applying a settings preset to your webcam whenever it's open. G Hub doesn't set the resolution and frame rate of your webcam, but it does let you change "priority" to either exposure or frame rate. It allows for the same settings adjustments as Logi Capture with the ability to manually change the exposure.
The gain gets forced to 128 when switching back from Logitech G Hub.
Unfortunately, there is no gain adjustment setting here making this software kind of useless for maximizing your webcam's quality. The gain seems to consistently revert to it's default value (128) if you verify it in OBS. This causes the webcam image to be way too noisy and makes the whites blown out. The ideal value is as low as possible (0), but you can't adjust that in G Hub. So close, but so far.
The only reason I would use either of these software is to change the field of view of your webcam. Even though you can zoom in up to 5X in any software that lets you access the driver settings, the field of view change is a little different. This change is semi-permanent and can only be changed back in Logitech's software. Also, you can still zoom 5X in each FOV.
Field of View control is the only real reason to use Logi Capture.
Changing the FOV in Logi Capture. 90 is actually too wide for my green screen.
Video conferencing software (Zoom, Skype, etc)
Using the Brio directly in Zoom.
The Brio can be used directly in video conferencing software like Zoom, Skype, or Microsoft Teams, but the downside to this is you get almost no control over your webcam at all, so your image basically looks trash. You also can't zoom in or change your field of view if you don't want so much of the background showing. I'd avoid this if at all possible. Getting your OBS footage into Zoom is easy with my guide.
High Dynamic Range in software (?)
The last thing I want to talk about in regards to software is HDR or High Dynamic Range. This webcam is marketed as having HDR. I have a 4K HDR monitor, but I can't see any difference whatsoever when enabling HDR in Logi Capture or Logitech G Hub.
In addition, the footage recorded with HDR on while using Logi Capture is definitely NOT 10-bit HDR footage. Among other ways to check, like MediaInfo, the file doesn't show as HDR when you upload it to YouTube. I hypothesize that the HDR on this webcam is just marketing. I've seen a lot of reviews mention the HDR, but I've never seen any review actually demonstrate the HDR.
HDR toggle on in Logi Capture.

HDR toggle off on Brio.
Can you see a difference between the two images with HDR on vs off? Me neither.
Problems with the Brio
Here are 3 biggest problems I've had with the Brio since buying it:
Persistent settings
Input delay
Flickering
Persistent settings
The first problem I've already mentioned which is no real ability to have settings that persist after unplugging the webcam or rebooting the system. This is really annoying and there's not a viable workaround besides the half-functional G Hub. The only webcam I've used that doesn't have this problem at all is the AVerMedia Live Streamer CAM 513 (my comparison). That webcam definitely does not look as good as the Brio. But if you really need that feature, that's where you'll find it.
Input delay
On my main PC, the Logitech Brio takes about 100-150 ms to process the image in OBS. This varies a bit depending on the program being used and the computer you're using. When I was making videos on my laptop, I didn't even know this was a problem until I built a new PC, which is way faster and has faster USB ports, but there's still more delay.
This delay means if you're using a separate mic (which I recommend), you might have some desync in your audio. It's not a lot, and it's pretty easy to fix. I'll link a video going over different ways to deal with it. But basically you can just add a 150 ms sync offset in OBS to fix this. You can also fix this in video editing software.
You can add a delay to your audio in OBS with advanced audio properties.
Ironically, I first encountered this issue in my OBS Settings Guide video, and you can see the slight desync.
Flickering
The final problem I had with the Logitech Brio is flickering which happens occasionally. it's when the screen has a sort of glitch effect it looks like screen tearing. This seems to be caused by the USB ports not providing enough power to the device. I’ve tried various suggested solutions but no real fix.
That said, the problem disappears as soon as I start recording or streaming in any software. It’s only present in the OBS preview window when idle. When I find a permanent solution, I’ll add it here.
Verdict
I highly recommend the Logitech Brio. Since originally reviewing this device, some new webcams have taken its throne as #1, but it’s still the best device at its price range.
Its color accuracy is decent and the autofocus and field of view are two other strong points. The Brio is an excellent device, but make sure to pair it with some good lighting to get the most out of it. I’ve reviewed the Elgato Ring Light which I use with the Brio regularly.
Logitech Brio: https://amzn.to/330gYo0
Frequently Asked Questions
I’ve been using the Brio as my main camera for YouTube and Twitch for a while, so I’ll use my experience with the device to answer some of the most commonly asked questions below:
Can the Logitech Brio zoom?
The Logitech Brio can zoom up to 5x in Logi Capture, G Hub and OBS. The field of view can be changed in Logi Capture and G Hub. 5x zoom is available at each field of view.

Brio at 1X zoom.
Brio at 5x zoom.
Is the Logitech Brio wireless?
The Logitech Brio only works wired. It uses a USB 3.0 Type C to Type A cable that is included in the box.
How do you install the Logitech Brio webcam?
The Brio is plug and play. It automatically installs drivers to your computer the first time you plug it in. It is then detected as a webcam for immediate use in any program that is compatible with webcams like Zoom.
How to change Logitech Brio settings?
The Logitech Brio webcam’s settings can be changed in Logitech Capture, Logitech G-hub and Open Broadcaster Software Studio. Here's how:
In Logi Capture select your camera source on the top left. In this window you can change most of the Brio's settings such as the field of view and white balance. To change the frame rate and resolution, click the camera icon on the upper left.
In Logitech G Hub, click your device in the middle of the screen. You can change both camera and video options here and set them as a custom preset. You can also select pre-made presets.
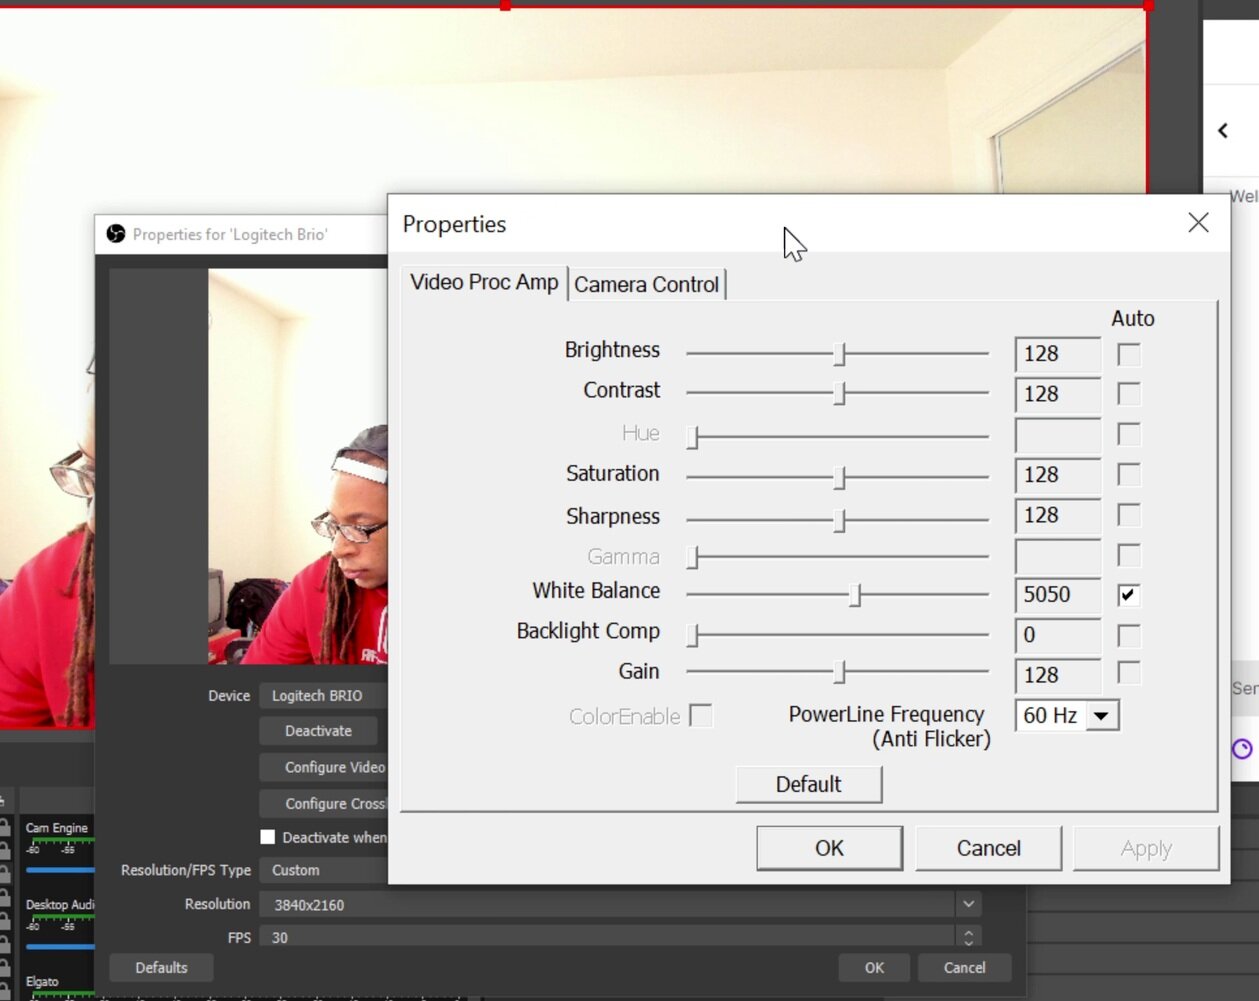
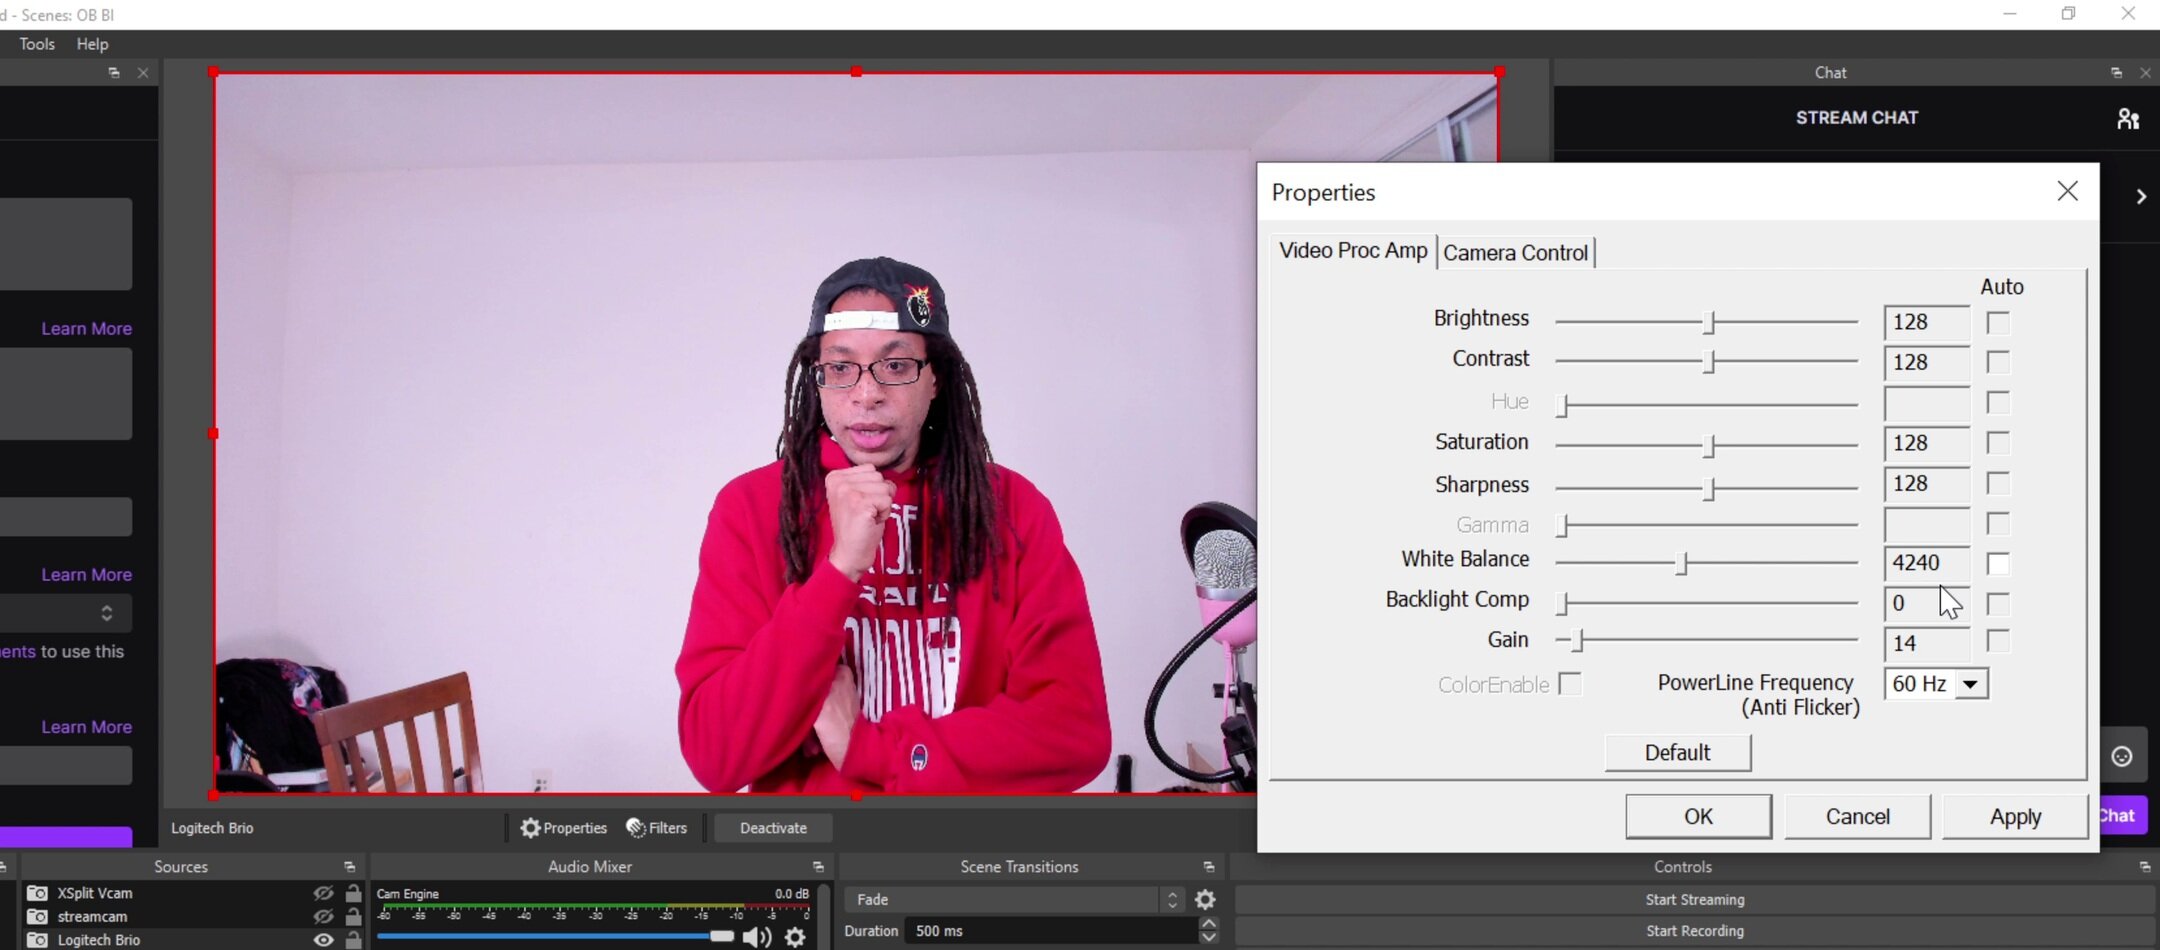
In OBS, click your camera source and click properties. You can change the frame rate, resolution, and color space from this window. To change additional settings, click configure video. OBS gives the most control over the Brio compared to other programs. Linked is my guide to the best settings for the Logitech Brio.
Logi Capture selecting source.
Logi Capture changing frame rate and resolution.
In G Hub first click the Brio in the middle of the screen.
In the camera tab, you can change some basic settings.
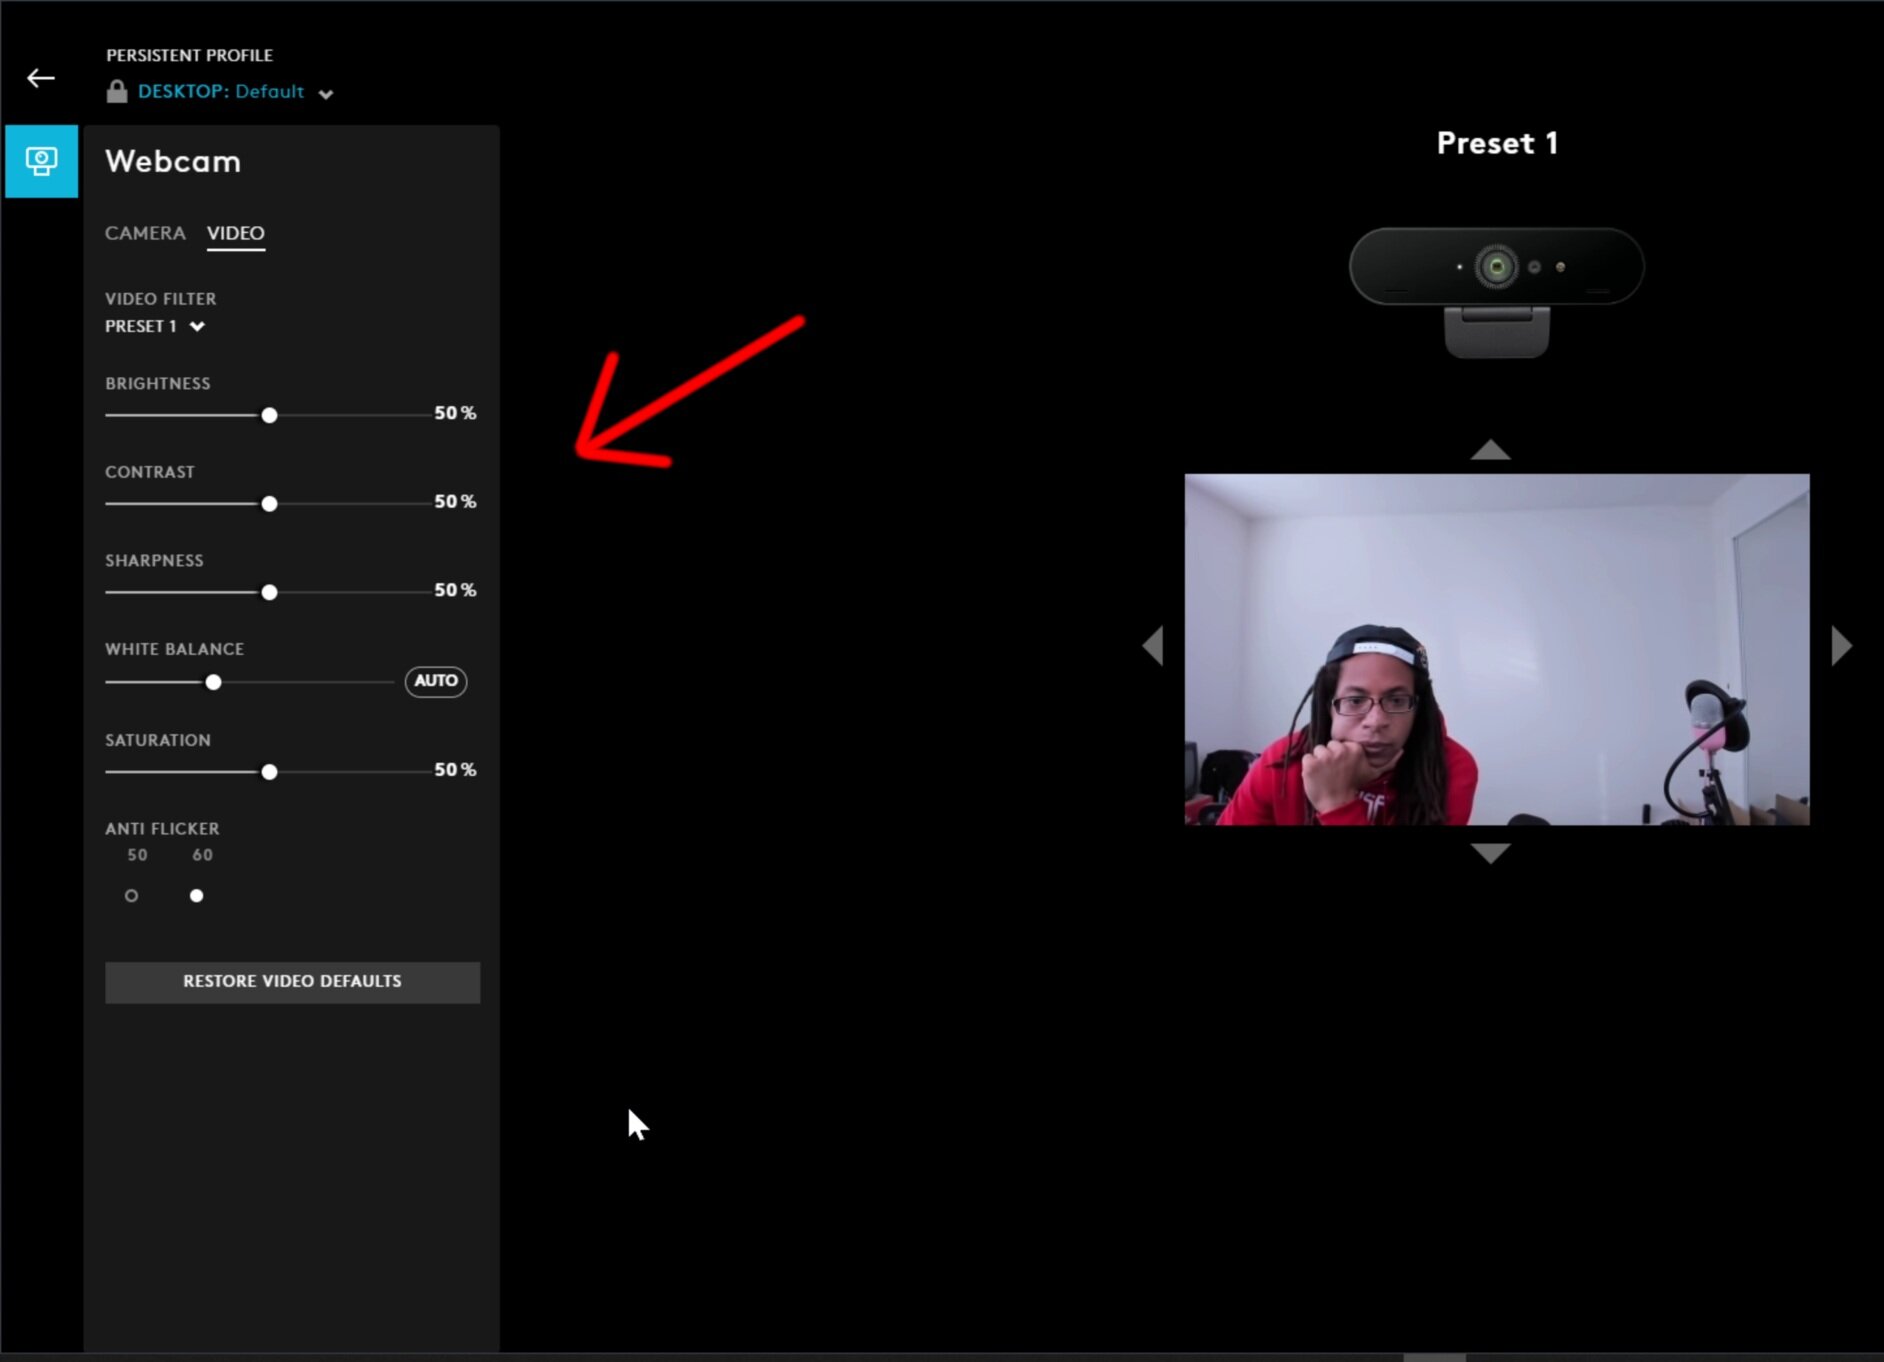
Additional settings can be changed in the video tab.
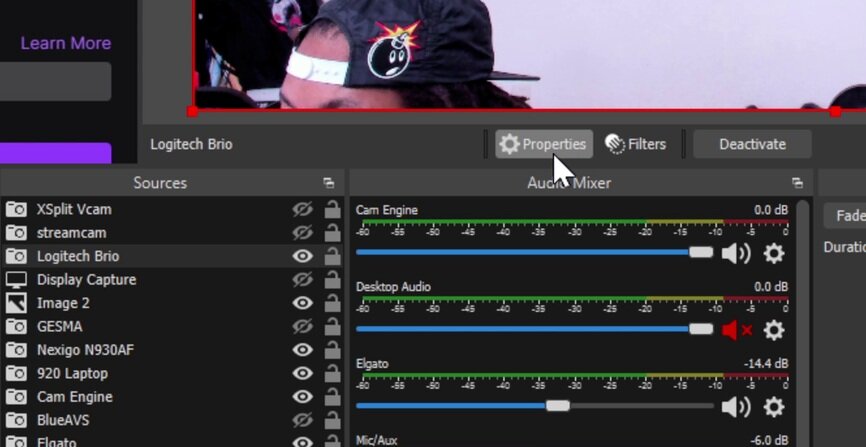
In the sources tab in OBS, select your webcam and click properties.

You can change some basic settings in the properties window and more by clicking “Configure Video”.
What to do if Logitech Brio is too blue or red?
An image that's too red or blue can be adjusted by changing the white balance. This can be done in OBS by selecting the webcam and clicking properties > configure video > white balance. The auto tick box must be unticked to alter the value.
Many programs like Zoom do not grant access the Brio's white balance. However, you can change the settings in OBS and use OBS Virtual Camera as a camera source in those programs.
How to deal with Logitech Brio focus issues?
Sometimes, the Brio has trouble focusing on certain objects. The focus slider can be adjusted manually in the “camera control” tab of OBS. The Brio calibrated to focus on faces, so it often refuses to focus on anything else when a face is in frame.
Logitech Brio is too wide
There are two options to make the Brio's shot more narrow:
You can alter the field of view using Logitech Capture or Logitech G Hub.
You can also zoom in up to 5x using either of those two softwares or in OBS.
The Logitech Brio’s field of view can be changed to 65, 78, or 90 degrees in Logi Capture and G Hub. Here’s how to change the Logitech Brio’s field of view:
In Logi Capture, open the app and select your camera source on the upper left. Then, you can click which FOV you want. In Logitech G Hub, select your webcam in the middle of the screen, and select your desired field of view in the camera tab.
Changing field of view in Logitech Capture.
Changing Field of view in Logitech G Hub.
Zooming up to 5x can be changed or reverted in OBS, but changing the FOV persists past a reboot and can only be changed in Logitech's software.
Logitech Brio not showing 4K
The Logitech Brio must be manually set to 3840x2160 in the Windows Camera app or in OBS. In OBS, you must make sure the video format is MJPEG. YUY2 and NV12 will not allow for 4K resolution. In addition, the Brio must be connected to at least a USB 3.0 port with a USB 3.0 speed cable. The cable included in the box works for this.
How to remove Logitech Brio stand?
Pull the monitor clip straight out, don’t twist it. Underneath is a 1/4th inch tripod thread.