
Logitech Streamcam Plus Review
As an Amazon Associate I earn from qualifying purchases. Amazon links in article are affiliate links.
Specifications
Price
Build Quality
Image Quality
Audio Quality
Image Stabilization and Vertical Recording
Software
Problems with the Streamcam
Specifications
Max Resolution & Frame Rate: 1080p, 60 FPS. Can record vertical video.
Aperture f/2.0.
Focal length: 3.7 mm.
Field of view: 78 degrees (diagonal).
Cable: USB 3.1 Type-C, 60 inch, non detachable.
Mounting options: Monitor clip and 1/4th inch thread tripod clip.
Small tripod included.
Streamcam on included tripod. Both mounting clips shown.
Price
I bought my Logitech Streamcam for $170. For current prices, I’ve included an Amazon link. This is more than I bought my Logitech Brio for, and for a full comparison against other top webcams, check out my best webcams compared article.
Build Quality
Streamcam on the Neewer 18” Advanced Ring Light.
The build of the Logitech Streamcam is mediocre. To switch from mounting on a monitor to a tripod, you have to swap out the clips it comes with. The device can’t be tilted in any direction regardless of which clip it’s on or if it’s in vertical or horizontal position.
The wire on the Logitech Streamcam is 60 inches long, non-detachable, and it’s USB-C. Not being detachable is a huge problem when it comes to convenience. Although you can put this on a camera ball mount that comes with many ring lights, getting the wire all the way from the mount to your computer is a different task.
The included tripod makes up for the convenience factor a little. It can be tilted in any direction and rotated 360 degrees. Unfortunately, at only 4.5 inches, the tripod is not tall enough to get good use out of it on a desk.
Image Quality
This section will cover:
Out the box performance
How to optimize settings and lighting
Sharpness
Color Accuracy
Exposure
Autofocus
Out the box performance
With default settings and basic room lighting, the Streamcam looks bad. Detail is almost completely lost and colors can’t be reproduced well. Even the f/2.0 aperture can’t help out here.
In the daytime with daylight only it performs a little better, but the grain is very noticable and ruins the image. This is pretty standard for webcams, so let’s improve the lighting environment and apply manual settings to improve the quality.
Night time with an overhead light only automatic settings.
Daylight only, automatic settings.
How to optimize Streamcam with settings and lighting
I have a full guide on the best webcam settings that applies directly to the Streamcam. You can change the Streamcam’s settings in OBS. Select your webcam, click properties, then click configure video. Some settings can be changed in “Video Proc Amp”, while others are changed in the “Camera Control” tab.
Settings
Keeping the exposure between -7 and -5 works well to keep the image bright. Gain shouldn’t go higher than about 50, but the lower it is the better. With gain too high, the grain gets quite intense and in brighter shots light colors get easily overexposed. Manual white balance is going to be based on the time of day and temperature of your lights.
Lighting
Streamcam in bright daylight and 2 Elgato Key Light Airs.
Elgato Key Light Air.
For lighting, I currently use the Elgato Ring Light (review) as my main light, and it complements the Streamcam very well. The more light you have, the better. I’ve listed the settings I used for the Streamcam and lights in the following shots. Backlight compensation setting is turned off for all shots (recommended).
Sharpness
Lights 5250K. White balance 4224. Exposure -7. Gain 37.

Lights 5250K. White balance 4224. Exposure -6. Gain 0.
The Logitech Streamcam’s image is respectably clear with bright light and optimized settings. It’s max resolution is 1080p, so it’s not razor sharp, but text can still be seen quite well.
If you have enough light, you can customize the settings depending on if you want your image to have the smoothest motion possible or the most detail that you can get.
A higher exposure (example -6) and lower gain gives a slightly cleaner image, but adds more motion blur. A lower exposure (example -7) with the gain cranked up more to retain brightness isn’t as clear, but there’s much less blur when moving. Since the Streamcam can output 60 FPS, -7 exposure looks super smooth if you can get enough light to utilize it.
No blurry background
In regards to sharpness, the Streamcam cannot product a shallow depth of field or blurry background by focusing on a subject any farther than about 6 inches away. A DSLR with this low of an f-stop would be able to do this no problem, but maybe the Streamcam’s sensor is just too small. You can fake a blurry background or replace your background with software or a green screen, but it won’t match a DSLR.
Color Accuracy
Streamcam at MJPEG, full color range.

Streamcam at NV12, full color range.
Color accuracy is the Logitech Streamcam’s strongest attribute. The Logitech Brio and C920 can’t match up to the range of colors this thing has. It’s the only webcam I’ve tested that could get my skin tone spot-on. If you have a slightly faded black shirt, it’ll look like just that. The Streamcam won’t approximate it to pure black and it will retain lots of its detail.
You can improve the colors even more by changing the video format from MJPEG to NV12 or YUY2. I find NV12 with full color range to look the best. It takes out some of the extra red created by MJPEG compression. Still, unlike other webcams, the colors still look quite good on MJPEG, and since you need that format for 60 FPS, you can just leave it at that and have a good image.
Dynamic Range
While the Streamcam excels in displaying the nuances between similar colors, it doesn’t do as well with both bright and dark sections in the same shot. In the below comparison, I have both the Brio and Streamcam set to -5 exposure and 0 gain.
Logitech Streamcam -5 exposure, 0 gain.
Logitech Brio -5 exposure, 0 gain.
The Logitech Brio is able to make the subject much brighter overall before completely overexposing the bright wall. As the Streamcam hits that same upper range of brightness on the wall, but the subject is still too dark. In all my testing, the Brio can always produce a brighter shot with the same amount of light than the Streamcam is able to.
Here you can also see two other differences between the Streamcam and Brio: 78 vs 90 degree field of view and sharpness (1080p vs 4K).
Autofocus
The Streamcam struggled to keep track of me even in great lighting. It kept going in and out of focus, which was quite annoying. If you try to put an object close to it, this device often remains oblivious to it. I learned over time to just turn off autofocus and lock it in OBS.
Track me if you can.
Trying to record workouts with the Streamcam’s autofocus was a bad idea.
Audio Quality
The microphone audio quality from the Logitech Streamcam sounds echoey and not very full. It can be used for video conferencing, but it’s tough to listen to over long periods. It isn’t the best choice for content creation - a separate USB microphone is a better way to go for audio. Here’s a sample audio clip.
Image Stabilization and Vertical Recording
Logitech’s Streamcam has a couple extra tricks up its sleve: image stabilization and vertical recording.
Image Stabilization
The stabilization on this device is decent. It’s not as stable as most camcorders - for example the Canon VIXIA HF R800 is much smoother. Shakiness is still apparent when just walking around.
There aren’t many opportunities to use the image stabilzation anyway. While it’s connected to a desktop computer, you’ll be pretty stationary. I tested it while walking around with a laptop, but how often will you need to do that?
Vertical Recording
Using the Streamcam in its vertical position.
The Logitech Streamcam can be flipped on its side using either the monitor clip or tripod clip to record vertical video. The device can detect which way it’s oriented to automatically shift the video feed from widescreen to portrait.
In Logitech Capture, you can then set the resolution to a vertical format like 1080x1920 to remove black bars from your recording. In OBS, you can do the same by adjusting your canvas size and video output resolution.
Vertical recording on the Logitech Streamcam is useful for YouTube Shorts, TikTok videos, and other websites that take advantage of 9:16 footage. I initially passed this off as a pure gimmick, but turned out to be useful as new forms of content have emerged.
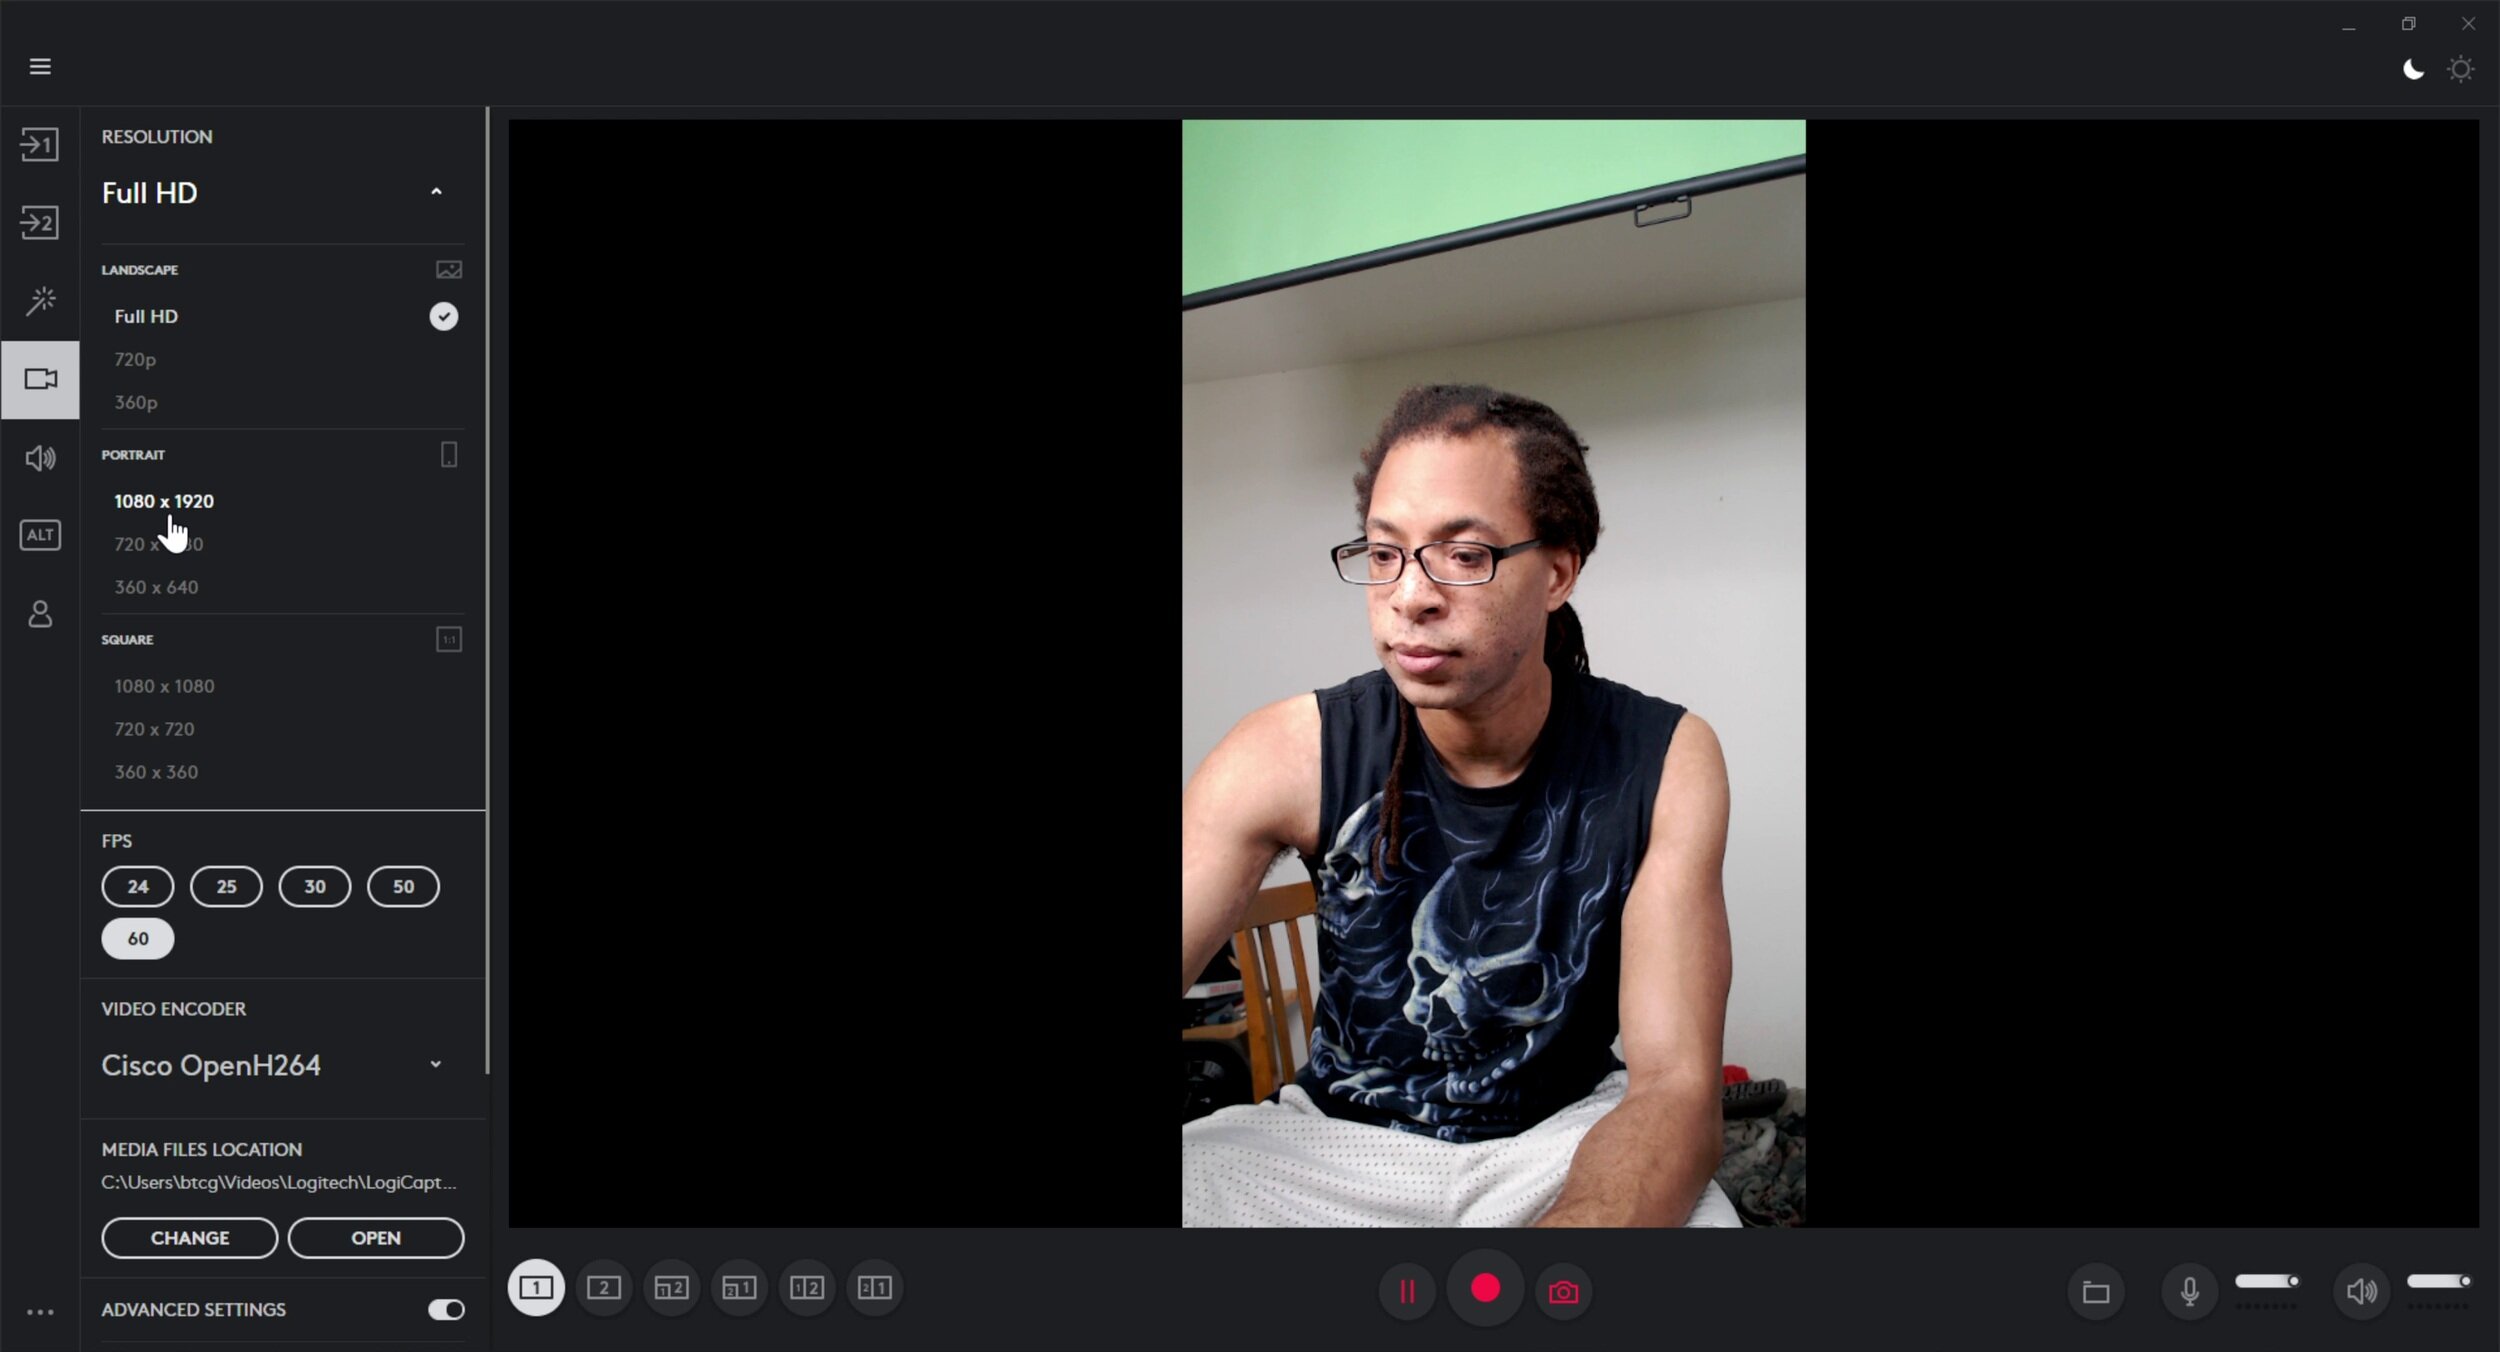
Default setting in Logi Capture is Full HD with black bars. This can be changed.
Black bars when set to 1080x1920 (portrait).
9x16 video for YouTube Shorts.
Software
The Logitech Streamcam is compatible any third party software that supports webcams like Zoom and OBS. As for Logitech’s own software, the Streamcam works in Logitech Capture, but it is NOT supported by Logitech G Hub as of this writing.
To get the best quality for Zoom meetings, it’s best to use the Streamcam in OBS, edit the settings there, then use OBS Virtual Camera to send your footage to Zoom. Just click Start Virtual Camera in OBS on the bottom right and in Zoom select OBS Virtual Camera as your webcam. Make sure you quit all the way out of Zoom before doing this.

Streamcam used directly in Zoom.

Streamcam with optimized settings and OBS Virtual Camera in Zoom.

Logitech Capture AKA Logi Capture.
There isn’t really any setting in Logitech Capture that you can’t edit in OBS. OBS gives you access to more options like exposure and it just does way more overall. Sending your footage from Logi Capture to other software causes significant delay, but this is not the case when sending OBS footage to Zoom.
Before you buy…
There are two things I need to warn you about if you do decide to pick the Streamcam up: connection type and bugs.
Connection type
Unlike other webcams currently for sale, this one only connects using USB-C. If you don't have a type-C port, you'll have to buy a USB type-C female to USB A male converter. I got one for less than $10 from Electop on Amazon, but current pricing is at the link provided.

USB Type C cable example.
ID 181389877 © Sai0112 | Dreamstime.com

USB Type A cable example.
ID 183778761 © Batuhan Toker | Dreamstime.com
Bugs
The two main issues I’ve encountered with the Streamcam are the device not being recognized and not being able to select 60 FPS consistently.
Streamcam not being recognized
Sometimes OBS straight up won’t detect the Streamcam at all. I thought it might be the converter I was using, but the native Logi Capture app would still recognize it - and sometimes it wouldn’t. Other times, only OBS would detect it.
Even after building a new computer with a type C port right on the motherboard, this problem still occurs as of this writing. This required lots of plugging in and out to work around.
Streamcam light is on, but OBS can’t access it. No Logitech program is open.
Streamcam not displaying 60 FPS
The Streamcam occasionally won’t allow you to select 60 FPS and automatically drops to 30 FPS. Here’s my solution:
To fix the Logitech Streamcam not displaying 60 FPS, make sure it is connected to a USB 3.0 port. A USB-C port is ideal, as USB-C to USB-A adapters may cause frame rate inconsistency. Also set the video format to MJPEG, not NV12 or YUY2.

Select MJPEG at the bottom of the Video Format drop down.

Only at MJPEG and with a USB 3.0 connection is 60 FPS available.
Unfortunately, even when you set things up perfectly, it’s possible that Logitech Capture will be able to use the device at 60 FPS, but other programs like OBS won’t. I’m not sure the root cause of this, but it’s one of the reasons it’s not my main device as of this writing.
Verdict
Streamcam at night. Elgato Ring Light + LimoStudio LMS 103 lighting kit.
I ultimately do NOT recommend the Logitech Streamcam.
It’s not a terrible device, but Logitech set up high expectations with this one calling it "the ultimate streaming experience". It’s not.
It can produce quality video and accurate colors when there's sufficient light, but Logitech has another webcam that beats this out in almost every department. The Logitech Brio has just as sharp of an image at 1080p, looks better in moderate lighting, has more consistent autofocus, and has a wider field of view. That thing can also do 4K and with USB 3.0 type-A.
Here is my detailed head-to-head breakdown of the Streamcam, C920, and Brio to help you make a potentially better choice. But to save you time, the Brio is what I recommend.
Amazon listings
Logitech Streamcam: https://amzn.to/2vNMCJi
Electop USB 3.1 Type C Female to USB A Male Adapter converter: https://amzn.to/2Nx5PaV
Elgato Ring Light https://amzn.to/34K9fvK
Logitech Brio: https://amzn.to/330gYo0